
Mail Buddy Download
Setup guide · about 5 minutes

Set up Mail Buddy for the first time.

Install the app, sign in to each Google account once, and choose what you want to see. Every step happens in Mail Buddy or on Google's own sign-in page.

Setup steps

  1. Step 1

    Install Mail Buddy

    Download the installer for your computer and open it.

    • Mac: open the .pkg. If macOS says it can't verify it, go to System Settings › Privacy & Security and click Open Anyway, then Install.
    • Windows: run the Setup .exe. If you see “Windows protected your PC”, click More info, then Run anyway.
    Go to Download →

  2. Step 2

    Click “Add Google account”

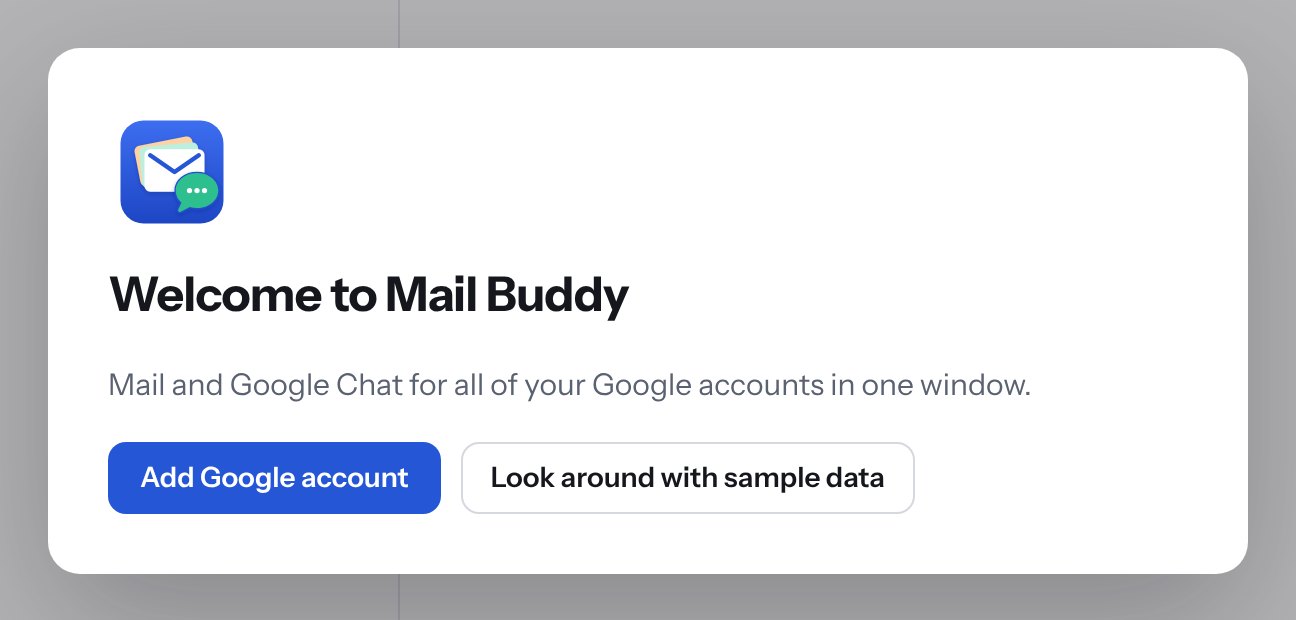
    Mail Buddy opens with a welcome window. Click Add Google account. Your web browser opens Google's sign-in page.

    Want to look around first? Look around with sample data shows every feature with made-up accounts. Add a real account whenever you're ready, from Settings › Accounts.

    The Mail Buddy welcome window with the buttons Add Google account and Look around with sample data.
  3. Step 3

    Sign in on Google's page and allow access

    In your browser, choose the Google account (or sign in to it). Mail Buddy never sees your password.

    • On the “Mail Buddy wants access” screen, tick every box, or Select all, then click Continue. Mail Buddy can't show your mail without the Gmail box ticked.
    • When the browser says you can close the tab, go back to Mail Buddy. Your inbox loads within a few seconds.
    • If Google shows “Google hasn't verified this app”, click Advanced, then Go to Mail Buddy. This appears while Mail Buddy is waiting for Google's review.
    What Mail Buddy gets

    Access to read, send and organise your mail, see your contacts for address suggestions, and (if you turn it on) Google Chat. See exactly what each permission is for.

  4. Step 4

    Add your other accounts

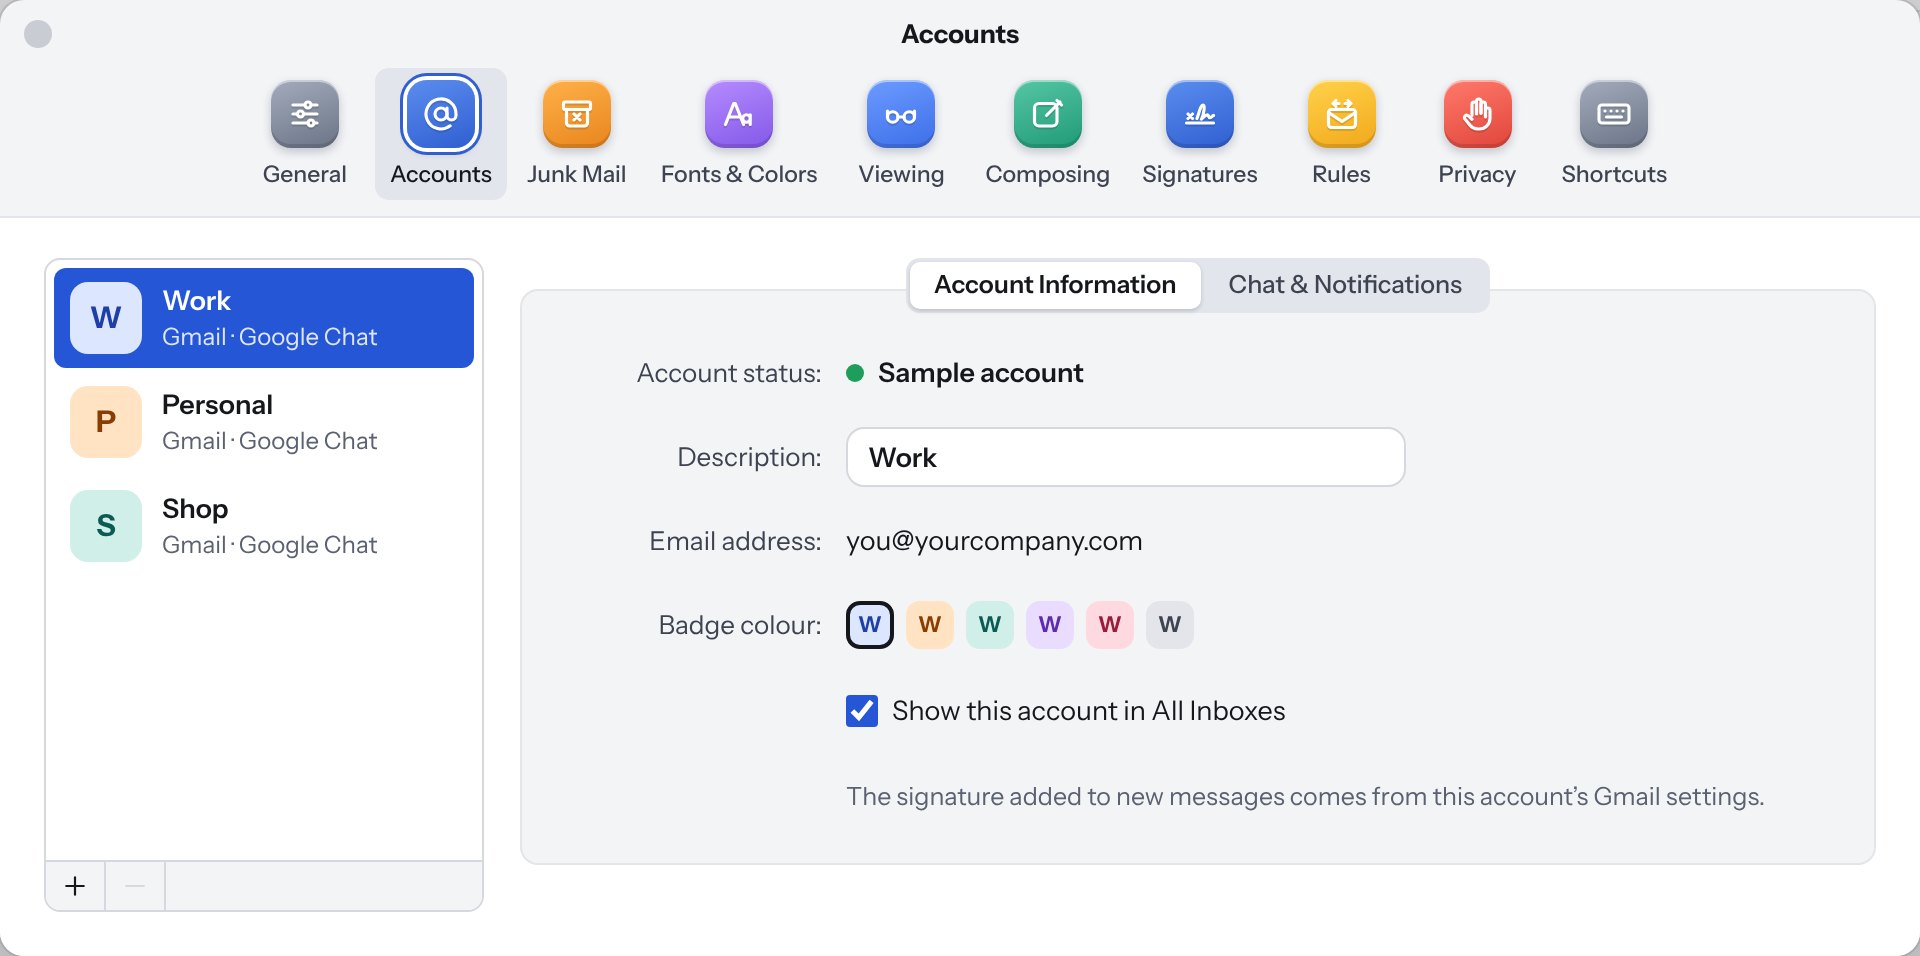
    Click Settings at the bottom of the sidebar, open Accounts, and click + under the account list. Sign in the same way for each account. All Inboxes then shows mail from all of them together.

    • Description: a short name like Work, Store or Personal. Its first letter becomes the tag on each message.
    • Badge colour: pick a different colour for each account so you can tell them apart at a glance.
    • Show this account in All Inboxes: untick it for an account you'd rather check on its own.
    Settings, Accounts tab: a list of accounts with a plus button, and fields for description, badge colour and Show this account in All Inboxes.
  5. Step 5

    Turn on Google Chat and choose notifications

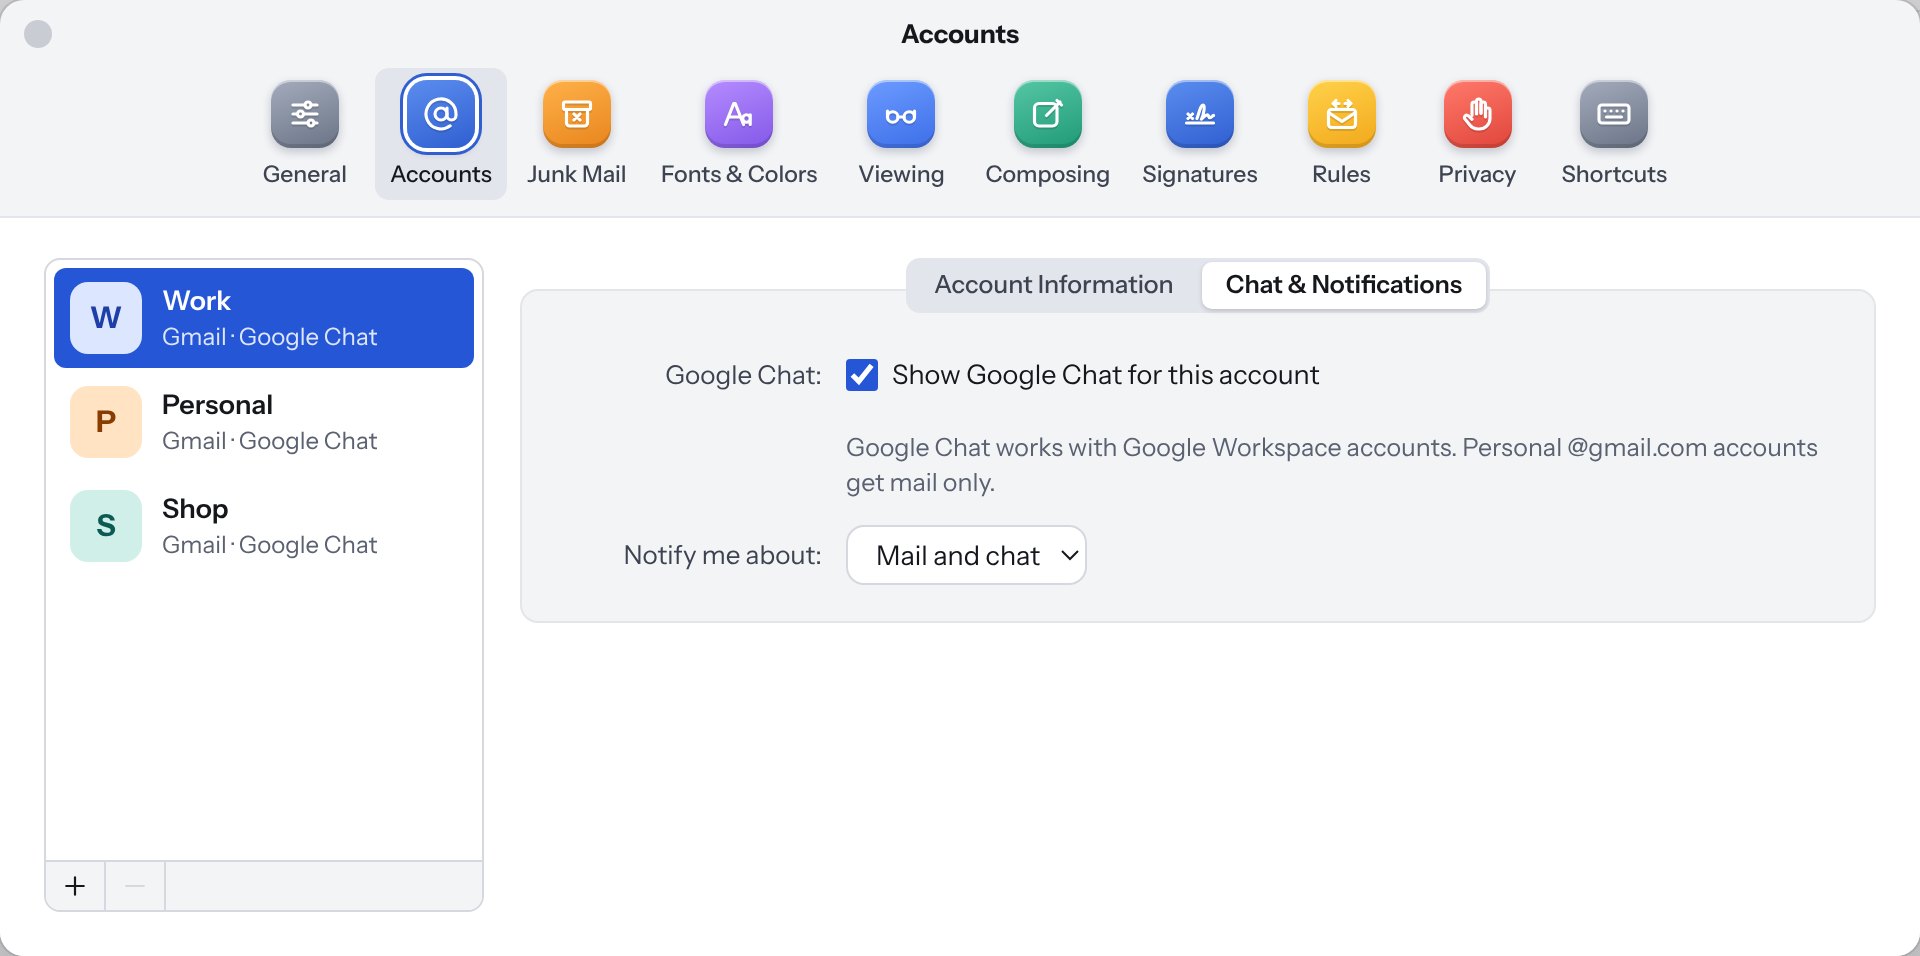
    For each Google Workspace account, open the Chat & Notifications tab and tick Show Google Chat for this account. Google asks you to approve chat access once in your browser.

    • Notify me about: Mail and chat, Mail only, Chat only, or Nothing, for each account.
    • Mac: the first time Mail Buddy shows a notification, macOS asks for permission. Click Allow. You can change it later in System Settings › Notifications.
    • Personal @gmail.com accounts don't have Google Chat; they get mail and notes.
    Settings, Accounts, Chat and Notifications tab with Show Google Chat for this account ticked and Notify me about set to Mail and chat.

That's it: every inbox and chat is now in one window, with one unread count on the Dock or taskbar.

Optional extras

Worth two minutes once you're set up.

Notes on all your computers

Settings › Accounts › Account Information: tick Keep notes in this account's Google Drive and approve in your browser. Do the same on your other computers.

Writing help

Already on. In a new email or the chat box, click the purple sparkle button and choose Polish, Formalize, Shorten and more.

Size for a big screen

Settings › Viewing › App size: choose Auto – fit to window so everything grows with a large window.

Signatures

Mail Buddy uses each account's Gmail signature automatically. Settings › Signatures lets you use a different one.

Shortcuts

Settings › Shortcuts lists every keyboard shortcut and lets you change them, or turn off the single-letter ones.

How often to check

Settings › General › Check for new messages: every minute by default. New mail usually arrives sooner on its own.

Everyday basics

Five things to know on day one.

ToDo this
Switch between Mail, Chat and NotesUse the switch at the top of the sidebar, or ⌘ 1, 2, 3 (Ctrl on Windows)
See one account's mail onlyUnder Inbox in the sidebar, click the account's name; click Inbox itself for all of them again
Add a note to an emailOpen the email and click the orange note button in the toolbar
Copy a sign-in codeClick the code shown under the email in the list or at the top of the email
See every shortcutPress ?; hover over any toolbar button to see its name and key
If something goes wrong

Quick fixes.

“Access blocked: Mail Buddy has not completed the Google verification process”

Until Google finishes reviewing Mail Buddy, only approved addresses can sign in. Ask ZayneSoft to add your Google address at sales@zaynesoft.com, then try again.

“Google didn't give Mail Buddy access to this account's Gmail”

A box was left unticked on Google's access screen. Add the account again and tick every box, or Select all.

An account says “Needs reconnecting”

Google asked Mail Buddy to sign in again, for example after a password change. Open Settings › Accounts, select the account and click Reconnect…

Chat isn't available for an account

Google Chat needs a Google Workspace account with Chat switched on by its administrator. Personal Gmail accounts get mail only.

The installer won't open

Your computer is being careful with apps from outside its store. Follow the Mac or Windows note in Step 1.

Still stuck?

Email sales@zaynesoft.com with what you see on screen (a screenshot helps) and we'll help.